Since everything is confined to my basement, I clean by re-circulating PBW at near boiling temps through the entire system. Most vent fans will also require some form of return air through a separate vent or window. If you live with people that dont love the smell of boiling wort, you may have a problem if you are brewing indoors. You'll want to wire it all quickly, but arthritis is a bitch. My only additional was adding extra this time around. I don't see an inline fuse in the ebrewsupply picture, but if there is one buy some extra fuses and keep them on hand. HIGH EFFICIENCY: Choose from 20 preset power levels (100W to 1800W) and 20 preset temperature level settings (100F to 460F). I started my eBrewing exploration by reading online resources. Sink ejector pumps can be a bit of an eyesore, so the wall also conceals what would have been an ugly mess of PVC pipe. Every time I brew the wonderful aroma (or stench depending on your point of view) fills the house and lasts a few days. Kal over attheelectricbrewery.comcreated the gold standard of building an elaborate home brewery with all the bells and whistles. I think the, My name is Shawn and Im an avid homebrewer and the author behind Hazy and Hoppy. There are so many sweet brew setups out there that I pulled a lot of inspiration from. Electric brewing is becoming more popular in the home brewing world, and for a good reason! Read our affiliate link policy. (And sometimes a really cheap short element = high watt density = bad - can Scorch the wort and lead to premature failure of the heater) This set up had a number of issues, large swings and overshoots, lack of temp stability - its like heating your house with a flame thrower. A sprawling mess as I commandeer our indoor/outdoor living space for brewing. I build lab equipment in my spare time for my better half - to help her out in the lab.
I use a Spike 5500-watt ULWD ripple heating element powered by a Brew Commander. I can easily do back to back batches of 17 Gallons in a single session. My old kettle lost 0.5 gal per hour during the boil and my new one loses 1.5 gal/hr. Although a three-vessel HERMS system seems needlessly complex, and I say that as someone who has no plans to go brew-in-a-bag. If someone is designing a panel from scratch and is willing to do it per your recommendations, what do you recommend to get better control? Even though I decided to use this option, I wasnt comfortable with it. u/kidmock gave the pros/cons already, so I'll list out some things I learned while building mine: If you don't have them yet, you'll need a set of terminal crimpers AND a set of ferrule crimpers. If you have to mount your own rails, make sure to give yourself enough space to wire things in on top and bottom. After investing a lot of time and money into a dedicated brew space, we ended up moving to a new home about a year later. If I was more knowledgeable in the world of electronics I might have noticed and not had any issues. My plan is to copy what Brian did. Do you understand all of the ins and outs of capacitors, potentiometers, and ground wires? I either needed to resign myself to brewing 4 or 5 times a year or I needed a new method. That being said, building a basement brewery requires a lot of thought and planning if you want to do it safely and properly. After the free trial you'll be charged $99.99/year. With the addition of the element, the induction burner and the temperature controller, I had a system that was reasonably priced, easy to use, but with minimal electrical work. My system is a4-stage premium RO systemthat produces 100 gallons per day (GPD) of filtered water. If you're not necessarily looking for an all-in-one electric all-grain brewing system, we also carry individual components to help build an electric brewery, such as an electric brewing heating element, temperature sensors, or individual electric brew kettles. Next, most electric brewing systems come with a built in temperature sensor, and are extremely capable of keeping your temperature right where you want it. My first setup was simple, efficient, and effective. There is much less chance of caramelizing your wort, creating hot spots or heating unevenly during the mash. I built my own because I was very disappointed in what was offered. Check this box if you would also like updates on Tulsa Area News and Specials, When you submit the form, check your inbox to confirm your subscription. While this gave off plenty of light, it wasnt really ideal and it looked ugly. After some thought, I decided to build a simple beer fridge to store all my draft beer. Are you using induction burners?I used to do full volume extract brewing in 6 gallon batches and my range had a hell of a time keeping it all at a boil.One of my buddies did full grain brewing using a burner from a turkey fryer and did everything outside, because he was impatient. The majority of electric brewing systems feature an internal heating element powered by a 240-volt outlet (similar to a dryer or oven outlet). Random example, totally didn't happen to me >_>. Everything has a place and makes logical sense. I still regret it even now. I had a 50 amp gfci plug put into my new garage and it's sitting there all sad looking at me. Everything is ready to go at a moments notice. This is a neat build and right up my alley!

This type of protection could end up saving your life. Depending on your tap water quality, it may be beneficial to add an RO system. Ad Choices, Tribus: Deep in the heart of the Garden state. Cheap sensors like thermistors. I want to go 50amp for back to back batches. With a system like this, I could brew in my basement whenever the opportunity presented itself. Who knows if they are safe for water, but not for something more acidic? Personally I didn't want multiple large kettles with pumps and lots of controller pieces. Electric brewing systems are convenient, compact, and surprisingly affordable! Recirculating the mash makes controlling the temperature much easier. For the basement outlets, I had an electrician install standard GFI protected outlets for pumps etc. This utility space was previously two connected closets that I ultimately decided to close up and use as the main brewing wall. These DIY kits reduce the tools and equipment needed, cuts down on design time, and is already proven to work safely. A PT100 with a good solid noise free connection is important. I wanted only components that didnt require any wiring. My burner is only 60K BTUs so a typical ~17+ gallon pre-boil volume of wort requires a lot of energy to hit hot break, and also to maintain a rolling boil for an hour or longer. and build something completely custom. This is your sandbox create what you want! 15 gallon vessels to brew 5 - 10 gallons of beer. A temp controller also makes step-mashing and mash-out (without overshooting my target temperature) easy. I was able to select and source each part to be to my own specification. Given the size of the heating element, I had to remove my bazooka screen. A pump isnt necessary, but it is nice. The good news is, a dedicated brewing space was part of the criteria in our home search (my wife is fully accepting of my craziness and Im very thankful for that). Worth a try. The material on this site may not be reproduced, distributed, transmitted, cached or otherwise used, except with the prior written permission of Cond Nast. If your going to use a touch screen - it better be damn well responsive. you wont be brewing 8 hours a day 6 days a week.
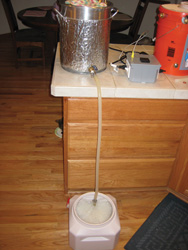
$799.99, Speidel Braumeister All in One Electric Brewing System - 20L/5.2G (110V) As I fruitlessly tried to make sense of instructions and wiring diagrams, I quickly accepted that I didnt have the knowledge necessary to safely build my own system. Robert is an avid homebrewer and craft beer aficionado. Know what corners are being cut and that it is acceptable to you or not. I can't give meaningful advice on the panel because I haven't finished mine (I unexpectedly acquired two two AIOs and didn't need it). Injecting the heat into the boil as soon as possible really cuts down on runtime when you brew using propane. It's way safer to test something than just plugging it in to see if it works. Thanks for posting throughout your build. I'm also not seeing how you transfer water from your HLT to the mash tun, as it looks like both pumps recirculate their own closed loops and don't transfer between vessels. There are many ways to tackle the electric brewing puzzle. This prototype consisted of the new element installed near the bottom of my kettle (underneath the false bottom) and the 1800W induction burner. This is one of my favorite things about eBrewing. I wanted the ability to brew (and clean) in place to avoid all of the wasted setup and breakdown time. Fantastic resource and many friends built a system following the same blueprint. Homebrew blog featuring beginner and advanced tips & tricks, craft beer, and product reviews. I wanted a solution that was affordable. Without stacking kegs (I had height restrictions), it seemed like a massive waste of dead space. $599.99, Gen 4 BrewZilla | All Grain Brewing System | Integrated Pump | Includes Wort Chiller | Wifi | Bluetooth| Rapt | 35L | 9.25G | 110V These days I brew 12-14+ gallon batches because the physical effort involved is similar to that of making a standard 5gal/19l batch of homebrew. Whether it be heating your strike water, mashing, sparging, or boiling, the electric elements turn off and on when needed. I went with the Steam Slayer from Brew Hardware. Unless you find one used, you will spend several hundred dollars. Assuming you brew 10g batches? All of the sink plumbing components live behind this wall in an easily accessible space. Ill do my best to illustrate monetary and logistic timesinks inherent to the processes and allure of making the best beer that youve ever tasted. Having a dedicated brew space makes the entire brewing process a hell of a lot easier and a lot more enjoyable. I built mine with parts from theelectricbrewery.com The guys (Kal and Mike) were awesome to deal with. The sink and water supply lines are my task now. First, and most obvious, they don't require the use of propane. You need a sink nearby when you are cooling your wort. I'm also not seeing how you transfer water from your HLT to the mash tun, as it looks like both pumps recirculate their own closed loops and don't transfer between vessels. (Or moving the wort to the boil kettle, for that matter) Guessing you'll move the hoses around. Pure water allows the brewer more flexibility in freely customizing each element.
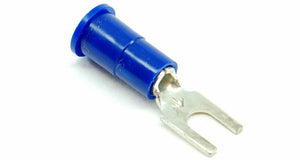
spade narrow terminal gauge required These are affordable and really easy to install given you have electrical access, to begin with. My advice to you is to get the largest sink you can fit in your space. I ordered my 30A one in late September and DIN rail was not standard, but it does not cost any extra to get a DIN rail model, you just need to put a note in with the order. He loves the gadget side of homebrewing and is constantly tinkering with his two breweries, a 10-gallon eBIAB setup and a 20-gallon three-tier rig. I was so sick of lugging equipment around and trying to clean brew pots and fermenters outside or in my always-messy-and-full-of-crap, kitchen sink. (Or moving the wort to the boil kettle, for that matter) Guessing you'll move the hoses around?If I were designing an electric system, I'd go with an element under the false bottom in the mash tun, and a recirculation pump to maintain even mash temperatures. A steam condenser or kitchen range hood or condensate hood. I was ok drilling holes in my kettle or other basic installation tasks, but I didnt want to be responsible electrocuting myself or starting a fire. Steam condensers are relevantly affordable (starting around $130) and eliminate the need for any other form of ventilation. You will need at least a 400 CFM fan for the smallest home breweries and even that may not be enough depending on your setup and requirements. Implement and operate a brewery control system (BCS) | 220V panel, Track electrical flow through your panel box (both 220V & 110V lines). If the panel doesn't work the first time you turn it on, it's probably because there is a switch on. One of the major advantages to electric vs. gas brewing is the efficiency of energy application to your product; brewing on a propane burner spills a huge percentage of that heat into the room that youre working in as waste heat, and the size of the flame requires careful management of the air. I really hope this was helpful and provided a little inspiration for you as well. The system had to run on 120v circuit(s), i.e. The latest spawn is an extension of many hobbies/necessities, mainly stemming from the need to geek out my home brewing setup. One aspect that accidentally fell into place was a dedicated utility space directly behind the sink/kettle wall. I also did it for about 1/4 the price. It is not a general heat source like a gas flame or common electric kitchen burner. GFCI protection is an absolute must when it comes to combining electricity with water. I highly DO NOT recommend attempting to burn propane in an enclosed space. Ive done hop rousing in the past by blowing CO2 through the dump valve in my cone.
If possible, I would love to include alternatives like cider/mead, if you do those at all. My original room was lit with a large fluorescent light fixture. Boiling wort for 60-90 minutes is going to generate a lot of steam. These items are next on my agenda. Control- this is were a lot of people cheap out. I wasnt yet really able to do much physically, however Id studied quite a lot of source material, and by the time that my body was up to the task went straight into firing off my first all-grain six gallon batch of copper ale. Required fields are marked *. The sink also doubles as a drain for my Steam Slayer so I dont have to monitor and dump heavy buckets of hot water. Get all the latest information on Events, Sales and Offers. I feel ya on the zapping yourself story. Don't get mad, get to looking for said switch. He used igloo drink coolers and other DIY/home-made quick and dirty sort of equipment. Without a way to vent carbon monoxide from my basement, electric brewing was the only option. But this article is for the mere mortals among us that want the advantages of electric brewing without electrocuting ourselves or burning down our homes. And the heat stick in the wort made me nervous. The good news is you will save a lot of time, money, and aggravation from trying to exhaust steam. When the panel is on its back, the weight/tension of the wires will try to pull the door shut eventually. I regret that I did not get a good Klein or Irwin wire stripper before doing my BruControl box. I hadnt anticipated how great cleaning equipment in place would be. It doesnt get much better. They totally transformed the look of the room.
This is a neat build and right up my alley! EASY-TO-CLEAN FULL GLASS PANEL: This commercial-grade quality induction hot plate features a seamless glass cooktop, making clean up easy. The market ebbs and flows but it can be easy to source used equipment in excellent shape. My aspired brew room, albeit bare-bones, was already finished with easy plumbing access and plenty of electrical options, so this obviously saved a lot of time and money associated with actually finishing off a dedicated space. OVERNIGHT SHIPPING IS NOT AVAILABLE. I have never been convinced of their safety. I found Electric Brewery.com among the most thorough, albeit mostly above my head and ability. Most people do this outdoors to avoid issues with steam damage and of course safety in the presence of CO.Heres a sample of a scotch ale that I brewed in the photos above just two nights ago:Ill get into specific gravity measurements as I move the thread forward, however simply put in that photo Im weighing a sample of wort just prior to adding the yeast to it, and that color, clarity, and specific gravity all get logged into my brewing log. Learn how your comment data is processed. It was nice knowing that if I couldnt clean my equipment right away, it wouldnt be sitting in my backyard where it could be damaged or stolen. Electric brew systems like the RoboBrew, Braumeister, and Grainfather are also known as eBIAB systems, and are basically an all-in-one brewery. His site is loaded with information and is a phenomenal resource for getting started. The wastewater runs out the bottom and into a bucket or a sink in my case. My Brew Commander plugs into an L630R twist-lock receptacle. I leaned into what the space already had to offer and spruced it up. This should flow nicely into a build of the circuitry, some of the plumbing, and then onto firing off the first all-electric brew day. Second, they are not manufactured with food grade materials. After waiting what seemed like an eternity for my strike water to heat up, I realized that the induction burner alone was not powerful enough. I think I need a TV somewhere. I'm also able to hold temps accurately for a perfect mash and no boil overs. I needed to move my brewing indoors.
We need to see some pictures of whatever you built! The water took too long to heat up. I designed and built my own controller. His career path has been strange and varied, including time as a sous chef, political consultant for over 25 campaigns, and more recently as a business intelligence professional at the US State Department and large financial institutions. This unit can be mounted to the kettle lid or through the sidewall of the kettle. My first brewery featured a 2424 stainless steel sink. The other benefit is less boiloff (about .60 gallons an hour) and the ability to maintain a more intense boil with less power. Its hard to really know what youre going to need until you truly work in a space for a while. Brewing took too long. Cons: The elements do to create hotspots. Not only is the space functional, but its nice enough to want to hang out in and have a beer. It takes forever to heat strike water and for wort to come to boil. Since it sits right off our finished basement, it really adds to the ambiance. This area featured a drop ceiling with easily accessible utilities and Lifeproof vinyl plank flooring. I'm still using the one that I built 8 years ago and was also able to upgrade it to back to back with minor updates. As I mentioned earlier, this will be really easy to DIY down the road with the utility area. If my dumb ass had used the multimeter first, woulda picked that right up. Delivery may take up to 15 business days. Needless to say, things worked out really well. Overall I'm extremely happy with my setup and process. I did a lot of research before making a single purchase. If you also want temperature control, it will increase your investment by needing two controllers (one for each element). Im really glad I did. I combed over hundreds of sites and forums looking for advice from fellow brewers. Its amazing how much junk comes out of my plate chiller and valves. Any plumbing additions or changes down the line can be easily managed without ripping apart the wall. There are a few other options such as induction or all-in-one 120v systems that plug into a standard outlet (Clawhammer 120v or BrewZilla for example). Induction heats very evenly across the surface of the kettle. Where do you recommend shopping for used, decommissioned and are there brands you recommend? Premium Beer Brewing Kit With Kegging System, Irish Red - One Gallon Homebrew Starter kit, Summer Wheat - One Gallon Homebrew Starter Kit, Premium Electric All Grain Home Brewing Kit, Speidel Braumeister Electric Brew Systems, Mash Tuns, Hot Liquor Tanks & Accessories, Beer Yeast Starters, Culturing & Nutrients, Oak Chips, Cubes and Barrels for Homebrew, Gen 4 BrewZilla | All Grain Brewing System | Integrated Pump | Includes Wort Chiller | Wifi | Bluetooth| Rapt | 35L | 9.25G | 220V, Gen 4 BrewZilla | All Grain Brewing System | Integrated Pump | Includes Wort Chiller | Wifi | Bluetooth| Rapt | 35L | 9.25G | 110V, Gen 4 BrewZilla | All Grain Brewing System | Integrated Pump | Includes Wort Chiller | Wifi | Bluetooth| Rapt | 65L | 17.1G | 220V, Speidel Braumeister All in One Electric Brewing System - 20L/5.2G (110V). What I did learn piqued my interest. Review Comments: Being able to pick each part of my system was the main reason I went with this item over the other turn key systems. I knew I could build better for the same price (orders of magnitude). $200, OK. $1,100, no bueno. I ended up buying a black Hisense 18 cu ft fridge and added 5 Intertap faucets. Fermenters Brites Unitanks for Winemaking. There are few things worse than running out of gas during a brew session or making that last minute run to get a full tank. If you're getting a new kettle, take the time to calculate boil off with just water. I built a single vessel full volume biab with a rims tube for mashing and kettle elements for boiling. Impressive set up. Great customer service. https://shop.theelectricbrewery.com/, What do you do with all this beer? You will want to test the panel when the electrician gets done running the drop and if you, I don't know, grab a 10A shop vac since it's the closest thing and try to run it on a circuit that has a 7A fuse, it goes pop and you will be stuck. I wasnt willing to hire an electrician to install a 240v outlet. $2999.99. I had these in my old setup and loved the convenience. by Robert Blagg Updated on March 1, 2017. Ive been through two separate brewery builds in the past few years. $599.99, Gen 4 BrewZilla | All Grain Brewing System | Integrated Pump | Includes Wort Chiller | Wifi | Bluetooth| Rapt | 65L | 17.1G | 220V Make sure you prop it up or at least don't have your head/fingers in the way of components with sharp corners when it falls. Learn how to convert your propane system or build an electric system from the ground up! It usually starts with her complaining about a process that sucks - and then Im stuck figuring out a better way ( its my mental relax time - I love problem solving). Especially when I make a nice Belgian tripel, two liters of the 8% stuff and I'm done for the night. By this point, I had too much invested in my equipment to buy a turnkey system. Welcome brewers, mazers, vintners, and cider makers! This is especially amazing because the rest of the basement was finished with a drywall ceiling and carpet.

View all subscription options.
Sitemap 20